Upload Image

Image credit: leonardo.ai
Start utilizing Canvas V2 by uploading an image. To do this, just follow these steps:
- Select the 'Upload Image' button found on the left-hand toolbar.
- Pick an image to upload. This can be an image saved on your computer, one from a previous project, or one selected from the Community Feed.
- Once you've chosen an image, it will populate the canvas, setting the stage for you to begin your creative work.
Selecting / Moving and Shortcutting
Use the 'Select' (arrow) tool to rearrange elements on the canvas, such as the generation frame and newly generated images. Keep in mind that new images will only be generated within the generation frame when its lock icon in the upper left corner is unlocked.
- Select the 'Select' tool from the toolbar, then click on the element you wish to reposition on the canvas. Next, simply click and hold the element, dragging it to the preferred spot on the canvas.
- Utilize the Pan tool to move your viewpoint across the canvas space.
- Adjust your view by zooming in with the '+' button, zooming out with the '-' button, or using your mouse or trackpad to scroll. Alternatively, choose from preset zoom levels near the zoom controls for precise scaling.
- Finally, the keyboard icon at the top of the screen opens a shortcut guide, offering a list of hotkeys for both PC and Mac to streamline navigation and operation.

Image credit: leonardo.ai

Image credit: leonardo.ai
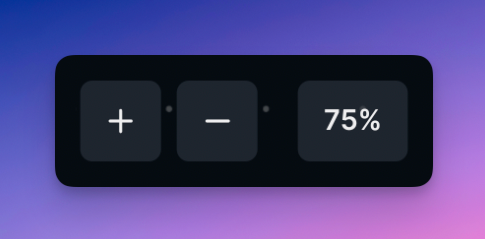
Image credit: leonardo.ai
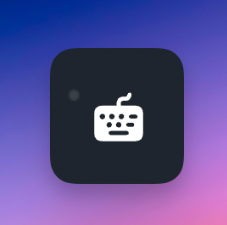
Image credit: leonardo.ai
Drawing a Mask or Erasing an Image
Utilize the 'Draw Mask' or 'Erase' tools in the toolbar for precise image modifications. The 'Draw Mask' option allows for subtle alterations, preserving underlying elements and style—perfect for small adjustments.
The 'Erase' function entirely eliminates sections you wish to discard or rework. After making your edits, input a prompt in the text field at the bottom to recreate the selected area within the generation frame. Here's a detailed overview:
Draw Mask

Image credit: leonardo.ai
With the masking tool selected, apply it to the parts of the image you wish to modify. After masking the desired area, type in a directive, for example, "person wearing sunglasses," and the AI will update only the masked section. This function enables targeted adjustments within an image, preserving the underlying details like color, subject, and style.

Image credit: leonardo.ai
Erase
After choosing the eraser tool, use the cursor to delineate the section you want to remove. Subsequently, input a directive for the visual content and command the AI to replenish the erased segment. This capability is beneficial for excising undesirable components from your image or as a substitute for masking when the modifications you aim to implement are excessively swayed by the existing imagery below.

Image credit: leonardo.ai
Be aware that you can toggle between various erasing modes such as 'All', 'Images', 'Sketches', or 'Mask' to specify which elements you wish to remove.
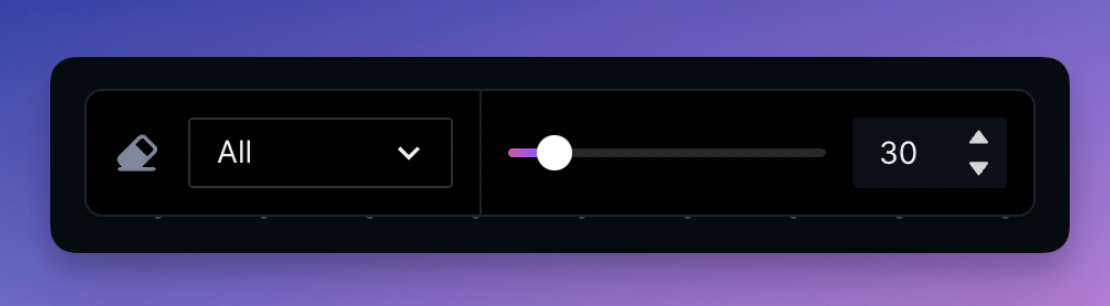
Image credit: leonardo.ai
Download Artwork
To save an image you're satisfied with, simply click the 'Download Artwork' button on the toolbar, and it will be saved to your computer.
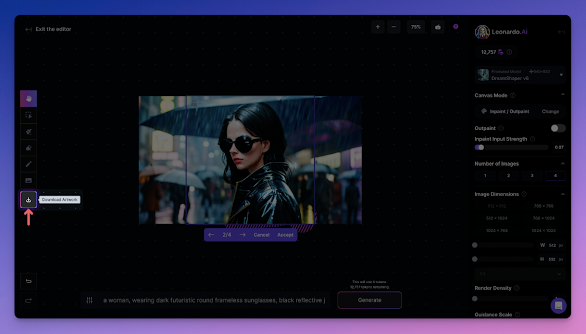
Image credit: leonardo.ai
Undo & Redo
Should you need to reverse an action or correct a mistake, you can utilize the 'Undo' and 'Redo' buttons located at the bottom-left corner of the canvas v2.

Image credit: leonardo.ai
Using the Control Panel
The 'Control Panel' situated to the right of the canvas serves as the command center for your creative modifications. It provides access to several key functions that enhance your editing process:
- Model Selection: Choose the AI model for editing. Selecting the same model that was used to create your original image is recommended for consistency.
- Canvas Mode: Here, you can switch between different creative modes such as Sketch2Img for varying types of image generation.
- Outpaint Toggle: Activate this for optimal settings for outpainting, which allows you to extend beyond the original image borders. (Note that turning this on deactivates the 'Inpaint Input Strength' option.)
- Inpaint Input Strength: Control the degree to which the AI considers the original image in the regeneration process.
- Number of Images: Decide how many alternative versions you'd like the AI to generate for review, with the ability to cycle through them or start over if needed.
- Image Dimensions: Modify the size of the image you're working on, which is particularly useful for generating larger areas.
- Render Density: Fine-tune the render size and enhance pixel density to better fit your generation context.
- Guidance Scale: Set the influence level of your text prompts. While higher values seem attractive, a moderate setting (around 7-9) usually yields the best results.
- Advanced Settings: For subscription plan users, you can input a specific seed, fix it to remain constant, or alter the Scheduler settings for more refined control over the generation process.

Image credit: leonardo.ai
Prompting & Generating
To create new imagery, type your instructions into the 'Prompt' bar and press the 'Generate' icon. Crafting an effective prompt involves specificity, complete sentence structure, and a detailed description of what you desire within the frame. Additionally, the 'Negative Prompt' feature allows you to specify what elements to exclude from the generation, like 'extra limbs' or 'nudity', ensuring the AI steers clear of undesired content.

Image credit: leonardo.ai
Text2Image
Activate this option to generate images directly on the canvas based on text prompts. This mode functions like the main Image Generation feature but with streamlined capabilities for Canvas use. Enter your prompt in the bar at the bottom to initiate a fresh image creation within the selected generation area, disregarding any existing content.
Img2Img
Select this from the Canvas Mode menu to transform an existing image. Position the generation frame over the area you wish to alter, and input your new prompt at the bottom. Depending on the frame size, prompt precision, and guidance scale, your image can undergo subtle tweaks or extensive overhauls, offering a broad spectrum of creative regeneration possibilities.
Sketch2Image

Image credit: leonardo.ai
Access the Sketch2Image feature by choosing it in the Canvas mode section. Position the generation frame on your canvas where you'd like the new image to appear, then click on the sketch tool from the toolbar on the left. A dedicated floating toolbar will provide options for color and line thickness. For optimal results, closely match the colors and approximate shapes to the intended elements of your image, using appropriate prompts to guide the generation. For instance, apply a green hue for a dragon's body and an orange for its fiery breath, carefully considering the scale and positioning of its wings, claws, and tail relative to other objects in the scene for a realistic depiction.
Inpainting
Canvas's inpainting feature lets you pinpoint precise segments of an image to prompt and refurbish, whether it's to replace unwanted elements, fill in gaps, or repair flaws, thereby achieving the envisioned outcome with our sophisticated tools.

Image credit: leonardo.ai
To engage the inpainting or outpainting function, first, pick it from the Canvas mode section on the right-hand toolbar. Afterward, position the generation box over the segment you're looking to regenerate and ensure the lock is toggled open to activate editing capabilities. Utilize the mask tool to delineate the region you aim to renew, and then input your specific prompt into the prompt field. Bear in mind, the Inpaint strength setting can be adjusted to dictate how closely the new creation will resemble the underlying area. If you've generated multiple images, you can browse through the options to find the one that best aligns with your vision.

Image credit: leonardo.ai
Please be aware that if the inpainting results aren’t quite what you expected, the original image may be exerting too much influence. Should this occur, consider using the erase tool for better clarity. Furthermore, be mindful that upscaled images often present challenges during editing; therefore, it's advisable to start with the original image and apply upscaling as a final step.
Outpainting
Outpainting enables you to seamlessly enlarge the canvas of your base image, extending the scene beyond its initial edges. When utilized effectively, this feature of the Canvas tool can create extensions that are in perfect harmony with the existing content of the original image.

Image credit: leonardo.ai
To engage the Outpainting feature, choose 'Inpainting / Outpainting' from the Canvas mode options on the right-hand toolbar. Once activated, position the generation box so it extends beyond the boundary of the original image, ensuring to include a portion of the original (a 60/40 split between new and old is a balanced approach). Keep in mind that the strength setting for Outpainting will influence how closely the expanded section matches the style of the original image.

Image credit: leonardo.ai
That concludes our guide to Canvas V2. We trust this has been a helpful resource for you. Keep in mind, we continuously introduce new functionalities and improve existing ones. Make sure to revisit this guide occasionally to stay informed about the latest updates.
Craft Your Next Masterpiece Using the Power of Leonardo AI
Embrace the power of AI and start creating with Leonardo today. Discover a world where creativity knows no bounds, and where your vision can become a stunning reality with just a few clicks. Join the Leonardo AI revolution and transform the way you create!
Ready to start your journey with Leonardo AI? Create an account now and begin crafting your vision with the ultimate creative assistant.
Create an account